Monday, July 17, 2006

Tape Tracking System

Working, as I do, for a leading provider of in-room entertainment and internet services for hotels in Australia, New Zealand and Fiji, I am called upon to handle a very large number of videotapes going to a large number of destinations each month. Once the tapes have been used, they must be returned to our offices and their serial numbers marked off, to assure the movie studios that all copies are accounted for. When I first started working for this company, our records were entirely paper-based, and the various systems we had inherited from previous mergers used incompatible forms and folders to record tape locations. Attributing an orphaned tape from a broken vcr could be extremely time-consuming, with thousands of tapes a month going in or out.
I spoke with my manager about the possibility of using a barcoding system to track our stock, much like a video rental store. He obliged with an inexpensive "pen" reader called the CueCat

Meow!
CueCat Barcode Reader
This connects to a ps/2 keyboard port and when scanned across a bar code, the numbers are effectivley "typed" into the pc. This makes it quite easy to write a database application to record the barcodes scanned.
I sat down with a pen and paper and applied some of my old university training to devise a data organisation scheme. Once I had figured out which information needed to be stored and where, I got to work writing code for my tape tracking system.
I used Macromedia Director to make the program, as it is easy to use for graphical applications, and has built-in commands for saving and loading data files.

Tape Tracking Sysetm
Tape Tracking System
I'm unsure of the legal aspects of mentioning the company name on a private blog, so I've blurred it out of these pictures. If you want to know which in-room entertainment company I work for, it's a major one.
The buttons dynamically resize and move as the mouse pointer rolls over them.

Tape Tracking Sysetm
Buttons Grow and Shrink
Each hotel is given a codename of up to 9 characters, and to assign tapes to a hotel, the user selects the name from a drop-down list.

Tape Tracking Sysetm
Selecting Destination
The allocated set of tapes is then scanned and their serial numbers are added to the list of tapes already at that location.

Tape Tracking Sysetm
Scanning Tapes Out
After a month or two, these movies will be replaced by new ones, and the tapes will be sent back to us. It is at this time that the barcoding system is particularly useful, as sometimes our interstate contractors can be somewhat careless packing the tapes, and put unsorted sets from different hotels together. This would be very hard to sort out using the old paper system, but the computer can tell us straight away where a tape has been.

Tape Tracking Sysetm
Scanning Tapes In
The returned tapes are removed from the on-screen list. There are a variety of ways to use the information in the database, from simply scanning a single tape to see where it has come from, to generating a variety of reports for importing into Microsoft Excel.

Tape Tracking Sysetm
Report of Tapes Out in May
The "Hotel Report" can be set for one hotel or across all hotels. A complete grid of movie titles and their quantities at each hotel can also be exported with the "Tape Report" option.
Each month, I print out a set of barcoded labels with the cheap and cheerful Labels Unlimited software, and stick the labels to the new tapes.

Kung Fu Hustle!
Shelf full of tapes
My special program runs on a K6-II PC operating at 350MHz, with Windows 98. This rather unimpressive spec is still quite enough to allow for speedy scanning, and I regularly backup the data files to a network drive.

My Lair
Barcode PC and AV Setup
The VCRs and TVs pictured are used for testing new tapes as they come in. This image also shows my special custom-built MP3 player Dock, which serves as both a music system and the speaker for the barcode "ding" sound effects as I scan.

Beatbox
A Particularly Ghetto Piece of Equipment
This cardboard speaker box is paired with a second one hidden below the vcr shelf, and the whole setup cost about $5. Sound quality is surprisingly good, at least at the sort of volumes one can use in a workplace. I have been offered some proper speakers, but I've grown quite attached to these.

Hotel List
Hotel Barcodes
I use this printout of hotel names with associated barcodes so that I may work away from the keyboard when scanning lots of stock. I simply scan each hotel name to switch the destination for the next stack of tapes.
Using this barcoding system has saved me enormous amounts of time, allowing me to concentrate more on the interesting parts of my job like graphic design and video editing.

Monday, May 29, 2006

The SEGA-MDP (MegaDrive Portable)

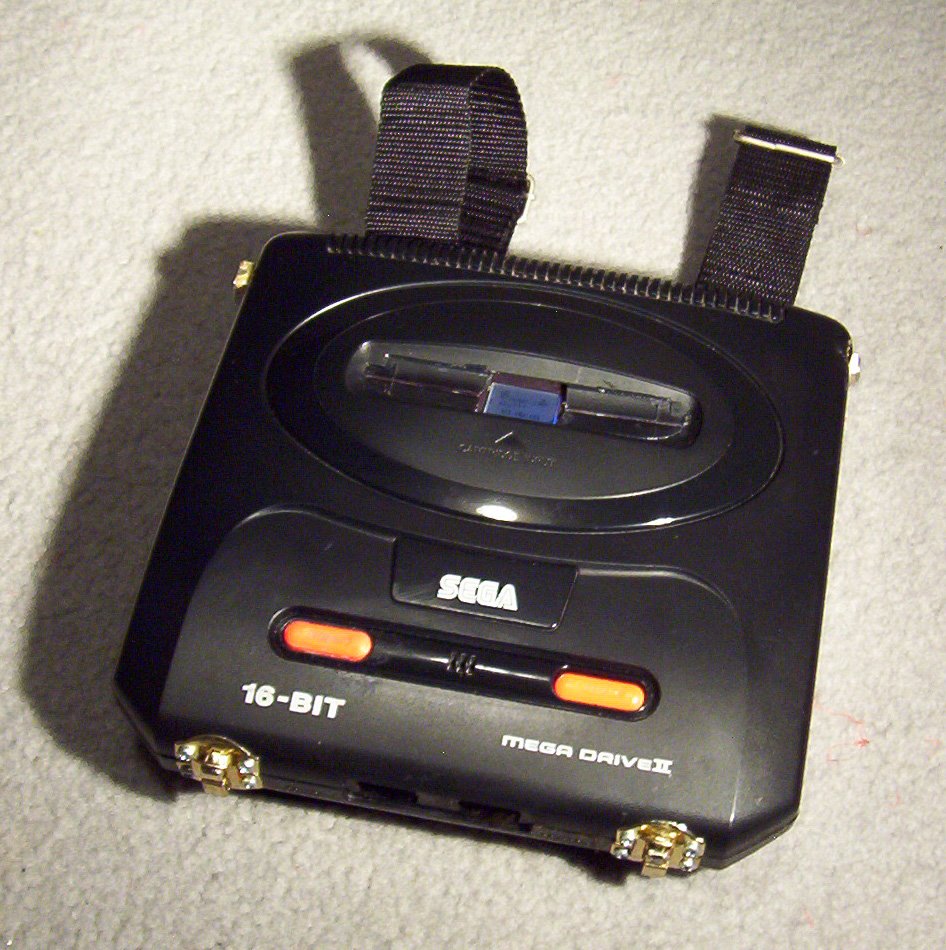
Having gutted my surplus Megadrive II to make a lovely bag for my girlfriend, I was left with a still-functioning circuit board, with its cartridge slot and plugs still intact.
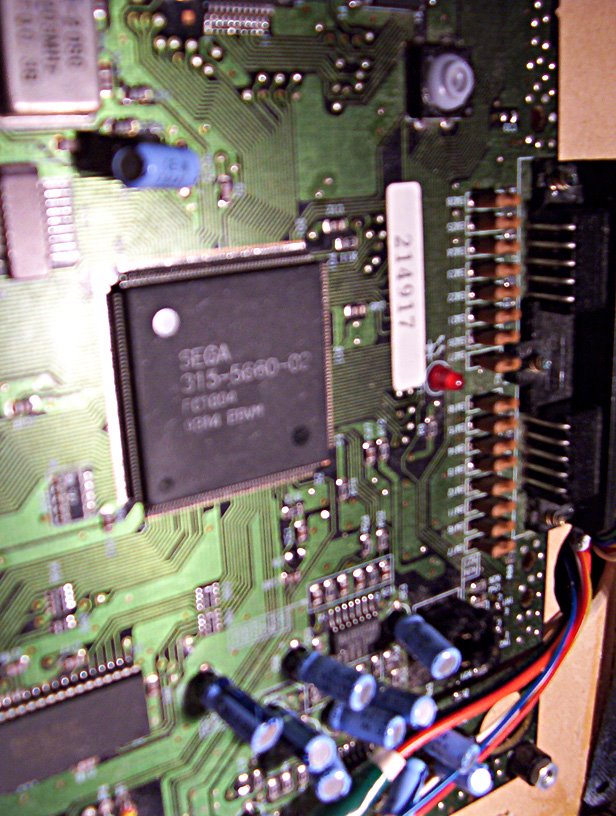
Megadrive PCB

Like the resourceful fellows who use every part of the cow, I thought I should find some practical application for this device. When I discovered that it would run quite happily on a 9 volt battery, I began to think about ways to build a smaller, battery-powered console. Finding a tiny lcd television for only $99 made the next step obvious; build in a screen and controller, making something like an oversized Gameboy. I set out the various parts I would need...
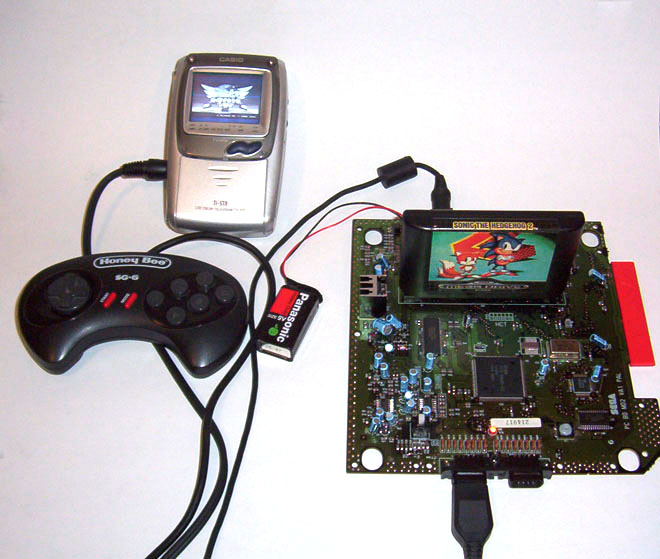
Initial Testing

Opening up the pocket TV revealed two separate circuit boards, which could be moved next to each other. I decided at this stage to keep things simple by integrating a genuine Sega controller into the device. A 9.6v NiMH battery pack, intended for remote-controlled cars, provided power. The Sega PCB would be mounted on the back side, with the cartridge slot facing the rear.
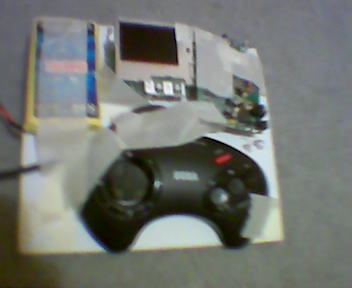
Prototype Mounted on Cardboard

It was at this stage that I hit a snag, when soldering the video-in wires to the tv board, I damaged the encoder chip and the picture went extremely dark. Fixing this proved to be impossible, and I began to look for a new screen.
Unfortunately, the small pocket TVs that had just been on sale were no longer sold anywhere. It seems that they have been phased out in favour of portable DVDs and video phones, so I had to look further afield.
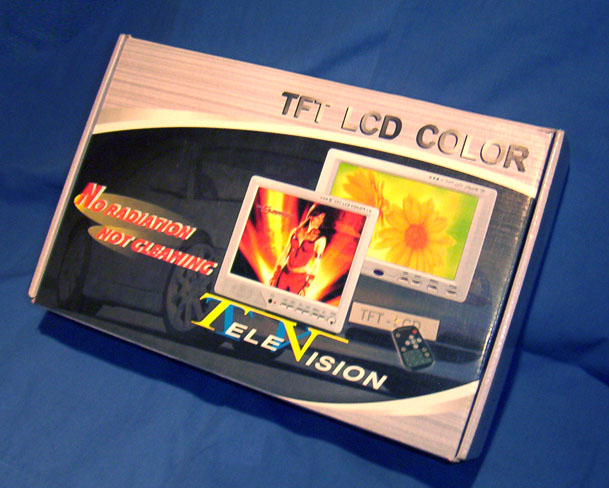
A stall at a Melbourne market eventually provided an inexpensive and much bigger screen, intended for automotive applications.
Unbranded LCD TV

The box proudly advertises such features as "No Radiation. Not Gleaming" which should be a massive relief for all those motorists irradiated to death by gleaming CRT screens mounted in their dashboards...
This screen, being designed for use in a car, needed a greater amount of power than my last one, necessitating a 12 volt battery pack. I decided, for reasons of cost and simplicity, to go with a sealed lead-acid battery, which would provide a useful 2200 mAh capacity for only $25. The other deciding factor was that a single large battery would greatly simplify recharging, instead of having to design a custom charging solution for a 10-battery pack with rechargeable AAs.
I decided on a new configuration for my portable, with the battery sitting below the screen, and the controller now split, with the D-pad (directional controller) on one side and the three Hit buttons on the other side. I built a basic wooden mockup of this design.
LCD in Wooden Frame

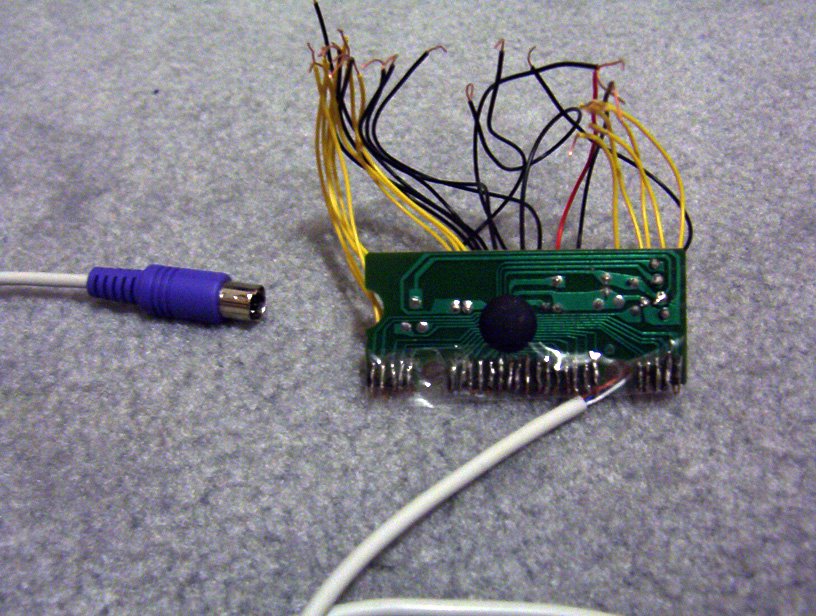
The incredibly helpful GameSX.com provided me with wiring diagrams for the controller ports and AV plug on the Megadrive board, and I constructed a small PCB with 3 buttons and the special multiplexer chip needed to use them on the Sega.
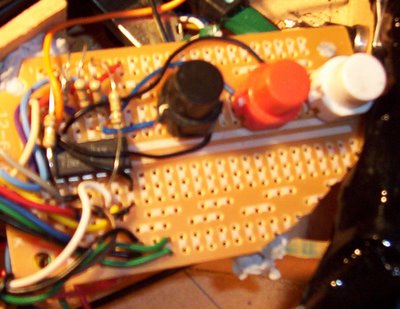
Controller Board

I cut a square out of wood and painted it black for the D-pad. Four small pushbuttons sit under the pad, which is supported by a central bolt that is free to rock slightly in each direction.
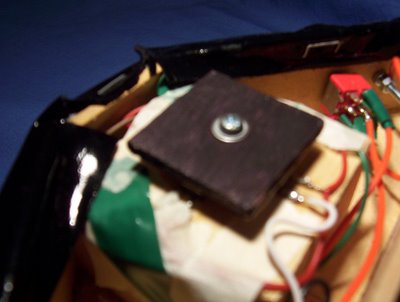
D-Pad

I built a two-compartment case, with the Sega PCB mounted in the rear compartment. An opening in the cover lines up with the cartridge slot, and a smaller, square opening allows clearance for the power regulator heatsink.
Sega PCB in Rear Compartment

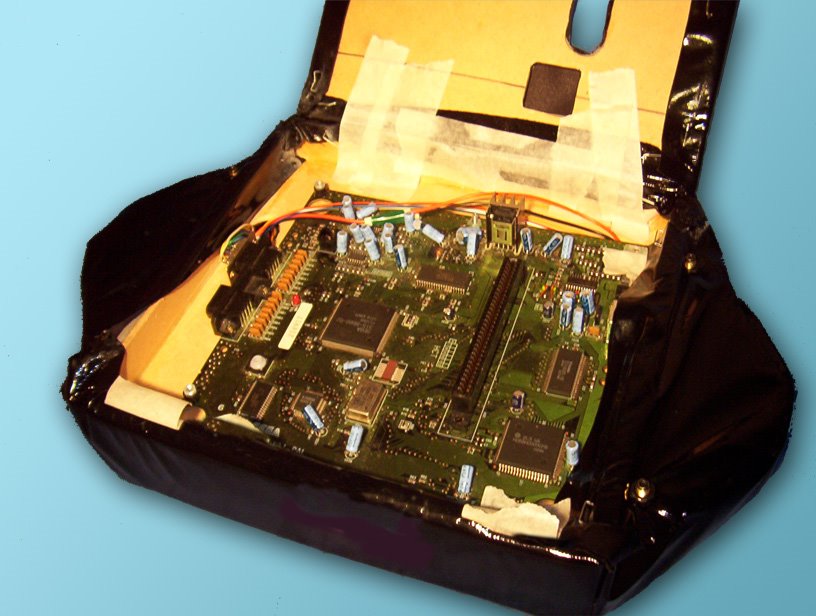
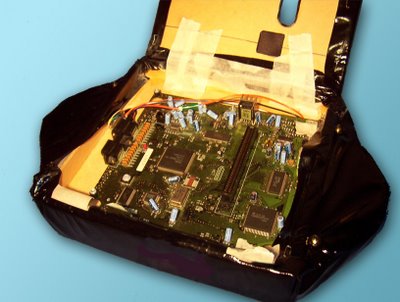
The front compartment of the case holds the LCD, battery and controller boards, as well as various wiring for the power and reset switches.
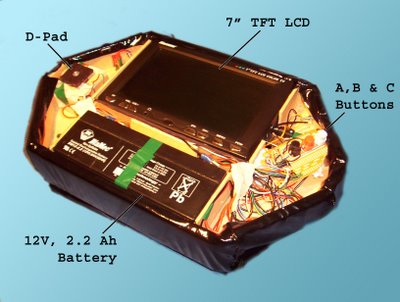
LCD, Battery, Controller in Front Compartment

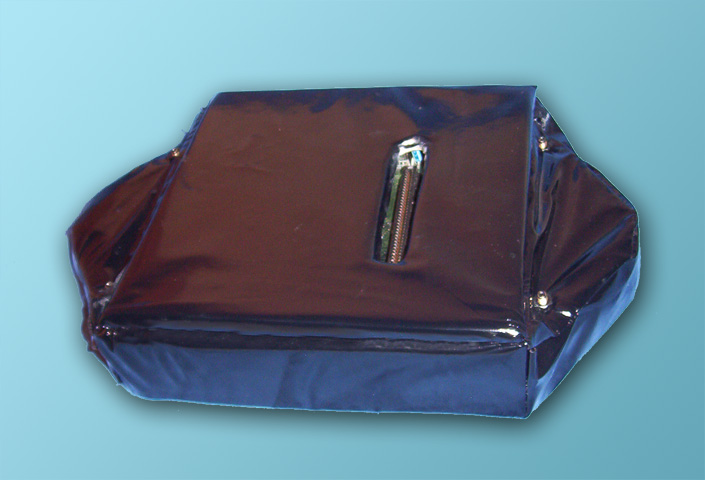
To make the device look and feel more interesting than the plain MDF board I used to construct it, I covered the MDP in black vinyl, with a thin layer of foam underneath. The seams were all hand-sewn one night, and the edges stuck down with heavy-duty staples.
Covering MDP With Vinyl

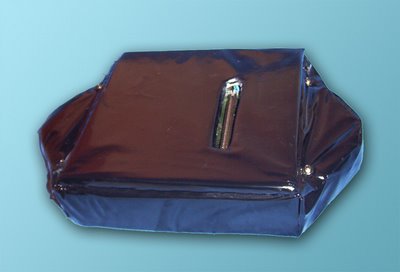
Rear View After Covering With Vinyl

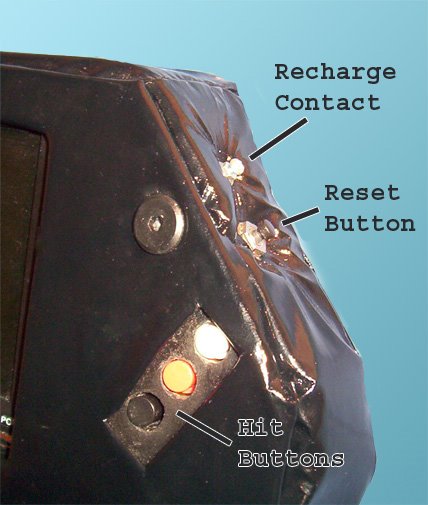
The Power switch and Reset button were placed on the top corners. The exposed screws sticking out above them serve as recharge contacts. The battery charger is connected by alligator clips to these contacts, and the power switch moved to the recharge position.
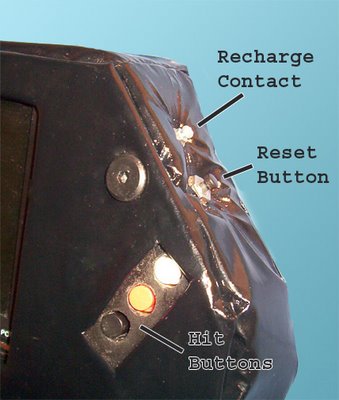
Recharge Contact and Reset Button


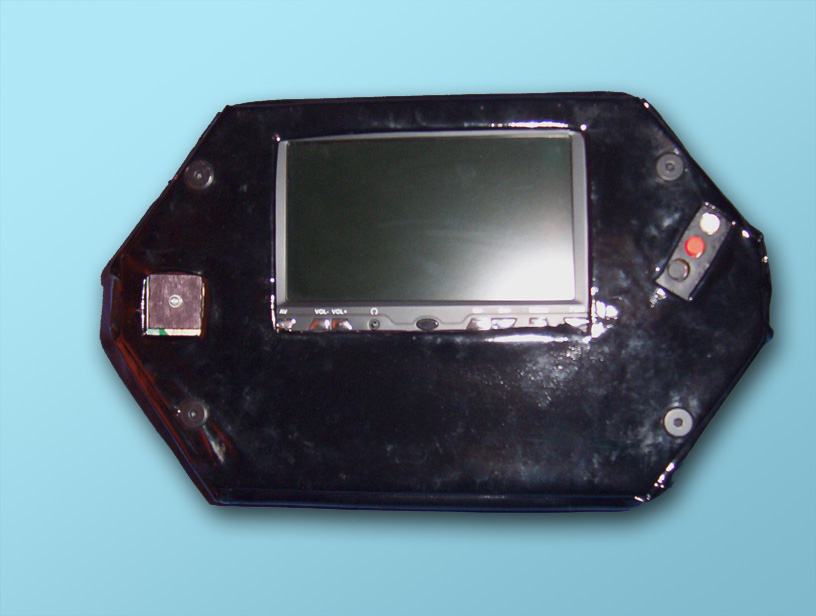
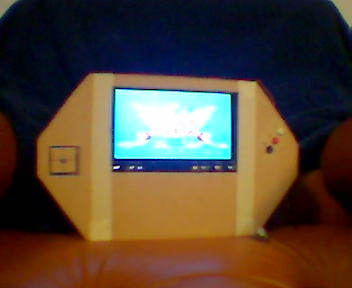
After connecting all of the electronics and finishing off the exterior, I had a working portable game device that I regularly use to play my collection of classic Megadrive cartridges. The LCD still has its tuner, and can be used to watch broadcast television when I don't feel like playing games.
Finished MDP

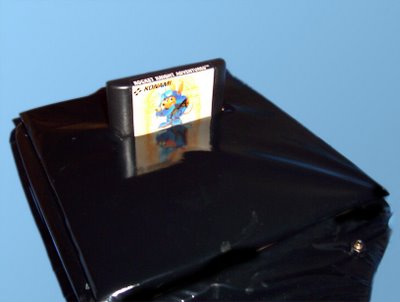
Rear With Game Cartridge

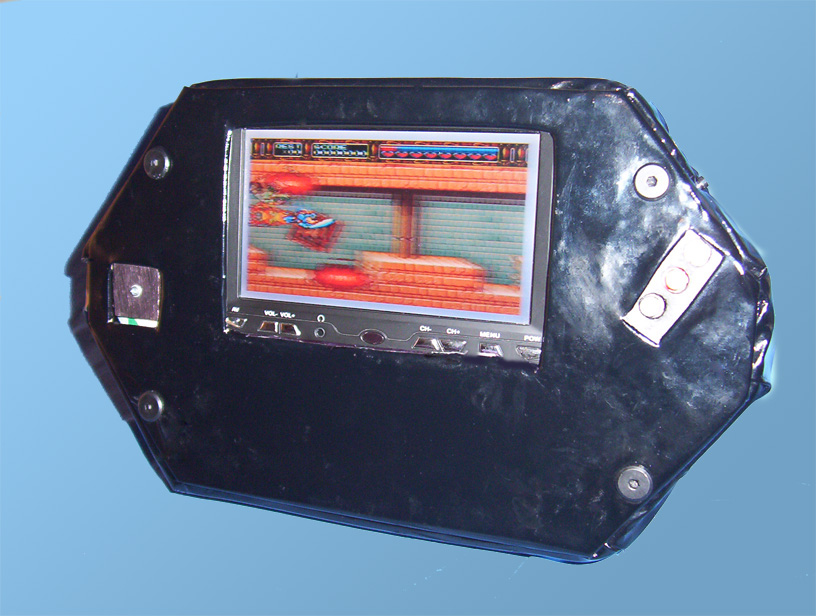
Playing "Rocket Knight Adventures"


Looking Ahead...

Having completed this rather time-consuming project, I'm happy to leave it in one piece for a while. I would like to make a second version later this year, hopefully with a lighter, longer-life battery, and a more compact shape.

Thursday, May 25, 2006

SEGA-MP3

This was last year's birthday gift for my girlfriend Ylana. The idea actually came to me in a dream, where I had a vision of kids using hollowed-out game consoles as toy cars and suitcases. I had recently been given a Sega Megadrive II by my friend Jamo, and already having a Megadrive 1 that worked fine, I was thinking of using the II's circuitry in another project (coming soon...)
Seeing these laughing infants run around with Playstations strapped to their backs, I thought "hmm, I could do that with my Sega..." and suddenly, wide awake, I sat bolt upright and said "Yes! It must be done!"

Sega Megadrive II
Sega Megadrive II
Having removed the precious innards from my console, I pulled out my Arlec Supertool, fitted a grinding bit, and set about grinding out the interior space until it was a hollow shell.
Looking at the big red buttons on the top of the Sega gave me another idea: build in an MP3 player, controlled by the buttons. Having only two buttons, I would have to find some way of controlling all the other functions. My other problem was where to put the battery compartment, and I considered putting a hinge on the Mega-CD port on the side of the console, and attaching the batteries there.
I was thus overjoyed to find my local Dick Smith store was selling a rebadged "DSE" player, which after much detective work I identified as a Minbo MB-800. A decent MP3 player in its own right, with 256MB of memory, SD card port, built-in radio and a nice little screen, it had several features that made it particularly appropriate for this job. Being very flat, it could be mounted under the Sega cartridge port without intruding into the interior space, the inline remote control would let me get away with only having two buttons on the main unit, and the built-in rechargeable battery (a tiny NiMH designed for MiniDisc players) would free me from having to add a battery compartment.

Minbo MB-800
Minbo MB-800
I removed the tiny screws from around the casing, and pulled off the metal back plate. I was actually impressed to find an off-brand flash-based player like this using a metal case.

It's Empty!
Outer Casing
The main circuit board had the usual teeny-tiny smd components used in consumer electronics, but the only points I really had to get to were the solder tabs on the "Play/ON" and "Stop/OFF" buttons, since everything else could be controlled by the remote.

tiny tiny solder points...
PCB shown with special NiMH battery
The underside of the PCB carries the SD card socket, the battery holder, and the headphone/remote plug. I extended this plug to a 6.5mm jack, because I like big shiny headphone plugs and I think they look hi-fi and old skool. The exposed traces visible at the bottom of this image are for the "Menu" button, which I later extended to a discreet black button on the side of the Sega.

Sega Megadrive II
Underside of PCB with Headphone Jack
I drilled out holes for the headphone and USB sockets and connected the external buttons, then cut a square hole in the cartridge slot cover for the screen.
The other part of my mod involved adding hinges between the top and bottom halves of the Sega, putting brass latches on the other end to hold it closed, lining the inside to contain any items placed in the backpack, and adding adjustable backpack straps.

A Unique Gift Item
Finished SEGA-MP3
As an extra touch, I arranged through one of Ylana's close friends to pilfer her CD collection, and preload the player's memory with some of her favourite albums.
I couldn't get to my camera when I took these next pictures, so they are a bit blurry, having been taken with my mobile phone. The second one shows the red chinese-print fabric I used on the sides of the lining. The interior of the compartment is covered with black fur. The red and black fits in well with the Megadrive colour scheme, while the fabrics add a feminine touch to a gift intended for a lady.

Earphones Plugged InOpened
Camera Phone Pics

Monday, May 22, 2006

Bonsai Electronic Installation

Another Uni project while I try to get some pictures and screencaps from my working life.

As a major project for my Digital Media degree, I wanted to make something that would let me use my whole skillset of electronics, graphics, sound and programming. At the time I was doing a lot of reading about computer programs that used algorithms based on living creatures, known as alife programs. It was my intention to use this kind of programming to make lifelike growing plants that could be guided or manipulated with the mouse pointer. The simulation I developed used an L-System to create a plant shape from small stick elements that could be linked to one or two "child" elements, depending on a set of rules that decided which sticks got to breed a child stick. Every so often, the child would be a flower, of which there were several kinds to add variety.
Digital Plants

When I decided to develop this into a major project, I considered ways of making the simulation more immersive. I thought about having the plants projected onto a wall, or spanned across several screens, with sensors tracking visitors across the room, but finally settled on the idea of having the plants projected onto the floor from above, with a large floor sensor to tell the computer where the people were standing.
Bottom Layer of Floor Sensor
The sensor consisted of two layers: a hard base with metal strips running across it, and a soft upper layer with wires running perpendicular to the metal strips.
Upper Layer of Floor Sensor
The upper foam layer had small metal buttons attached to its underside and connected to the wires. When stepped on, these buttons would form a circuit between one row of the upper wire and one column of the lower metal. By checking which rows and columns were touching, the control circuit could pinpoint where people were standing.
AVR Control Board
I used a prebuilt AVR microcontroller board to read the floor sensor, as it was extremely easy to program and wire up. Eight of the AVR's I/O pins were connected to the bottom layer of the sensor, and eight to the top layer. By sending signals to each of these rows in turn, the chip could create a grid in its memory of the positions being stepped on. It would then send this grid to the computer's serial port.
Installation Under Construction
The system was put in place for the COFA end of year show in 2003. The PC visible in the background ran the program, and the projector next to the PC had a small shaving mirror attached to the front, reflecting the image up to the ceiling, where a larger mirror was hanging. This mirror then reflected the image from directly above the people standing on the special floor, minimising shadows.
Final Installation
As people walked across the designated floor area, the plants would spring into life and begin to grow and coil around their feet. The speakers seen in the image above were used to play a series of Japanese flute samples played by my good friend Naomi Hamilton. The music would change depending on the number of people detected on the floor. From the quiet, slow tunes played in an empty room, more hectic passages would play as the sensor was weighed down by more feet. This added to the atmosphere of being in a dark space with wriggling, neon-coloured plants growing around one's feet.

PC-Riter Mechanised Keyboard

A few years ago I saw this picture on the now-possibly-defunct ZZZ News site.


Although the machine shown here is a non-functional prop, it intrigued me greatly, and I decided to look into making a working typewriter-based pc keyboard.
I was able to borrow a Remington Travel-Riter Deluxe, which could be switched into a special "no advance" mode, where the keys would still clack and the hammers would still swing around as normal, but without the paper feed advancing, so I wouldn't have to worry about hitting the end of the line while typing.


Remington Travel-Riter Deluxe

Having selected my typewriter, I had to work out a way of connecting it to a PC. I took apart a succession of keyboards, testing out the circuit boards inside them to see how the various contacts corresponded to the keys. The first version of the circuit I built used a PS/2 connector, but I switched to a USB keyboard later on, as it was easier to connect and disconnect from my PC, and I could even use it at the same time as my normal keyboard.

Keyboard Controller Circuit


Not wanting to cut up a working and well-maintained typewriter, I decided to work on a special add-on that would sit under the typewriter, with small switches protruding up under the key levers. This would let the keys move normally, and when not being used with the PC, the typewriter can be lifted off and used to type on paper as usual.

Pushbutton Switches for Keys

By very careful placement of these switches, I could ensure that pressing the typewriter keys would activate the corresponding key on the PC. This placement was mostly down to trial-and-error, and proved to be the hardest part of the project. The finished base was connected to the typewriter and demonstrated for my Electronics Workshop class at university, where I was able to use it on the university Macs to type a few words for my classmates.

PC-Riter with Control Board

The Dalec-79 Electronic Tennis System

The Dalec-79, a working videogame console, was part of my final presentation for Digital Media in 2003. I built three working units with packaging, and packed in a copy of my paper portfolio with each.


The basis of the console was the Velleman Classic TV Game kit, which comes with a pre-printed PCB and a specially programmed PIC processor, and when assembled can be connected to your TV set to play a simple "Pong" game.


The basic kit has small control buttons attached to the PCB, which are not easy to use, especially for two players, so I set about creating some nicer controllers, ones with that 70's flair that a classic videogame deserves.
The ends of a "rabbit ears" tv antenna made nice control sticks, which were simply glued onto the stalks of metal toggle switches, as they only need to go up and down. The serve/smash button is a tough pushbutton, and a 4-pin mini-DIN plug connects the controller to the main board. The body of the controller is a metal cooking bowl I bought from a discount shop and drilled holes into.


Having built such nice controllers, I couldn't just leave the actual device bare, so I went out and bought a bigger cooking bowl, and set to work...


The toggle switches at the front serve as Power and Reset buttons, with the audio and video connectors at the back. A small DC plug sits at the back of the unit and receives power for the console. The black sockets at the top are the controller ports, and the power LED lights up green when switched on. Using primarily stainless steel parts gives the whole unit a retro style, appropriate to the retro game you can play with it.